
 Home
Home
Having plants that all predictably grow at the same rate and mature at the same time is a big advantage. That’s why so many cannabis growers start their crops with clones taken from mother plants.
Phenotype vs. Genotype: What’s the Difference?
In rooted cuttings (i.e., clones), phenotype refers to the physical appearance of the plant. Plants with the same genetic makeup can wind up looking different—displaying different phenotypes—if they’re not grown under the same conditions. Sometimes the term can also refer to the different appearances that occur in seeds from the parental cross.
In plants, genotype refers to the actual genetic building blocks that the plant was created from—specifically, which genes were isolated and combined. The phenotype is the expression of these in the physical growing environment.
Selecting a Mother
All cloned plants have their origin with a seed plant. In cannabis plants that are commonly cultivated for THC, CBD, and the other cannabinoids and terpenes, either nature or a plant breeder introduced male pollen from one plant to the female flower of another.
Potential mother plants undergo assessment of THC, CBD and CBN. (Photo by Erik Biksa)
Professional breeders master the art of selecting parent plants as well as which ones to combine to get known and desired results in their offspring. Otherwise, cannabis breeding is a game of dice with a huge number of varying odds.
The ability of growers to replicate that one special seed plant over and over from thousands of possibilities is a very powerful tool that can be harnessed for cropping success. This is the process of cloning from mother plants—taking the cuttings and then rooting them to grow bud.
Identifying Your Mother
Mother plants can be a keystone in growing success. Having many identical plants reaching the same height and size at the same time under the same growing conditions, with known qualities in the buds at harvest, can make anyone a successful grower—provided, of course, that they select a mother plant to clone that suits their growing needs.
Healthy Stock Means Better Future Crops

Healthy mother plants can produce many clones. (Photo by Erik Biksa)
Once you know which plant will be your mother plant, you’ll want to ensure that it is healthy, robust and free of problems. Here’s a quick checklist to ensure that your moms are healthy and in perfect form:
- Are the tops of the plants yellowing or showing distorted growth? What about the bottoms—are they yellow or showing signs of scorching? If you answered “yes,” identify the problem and wait a week after making adjustments before taking any cuttings.
- When you look closely underneath the leaves with a magnifier, do you see anything moving around or any small, perfectly round egg-type structures? If you answered “yes,” identify the insect—is it a common problem like spider mites, whiteflies or thrips? This should be treated before you take any cuttings.
- Is there any light powdery mildew or molds growing on any otherwise green parts of the plant? If you answered “yes,” you may need to treat for powdery mildew or other foliar diseases before taking any cuttings.
- Have the plants been growing vigorously in a fully vegetative stage (leaf growth only) and drinking up water and nutrients regularly with no pH issues or nutrient buildup? If you answered “yes” to this and “no” to all of the earlier questions, you’re on the right track to reaping an abundant harvest of buds from your future crop of clones.
Preparing to Take Cuttings
The “Triangle of Success” for producing healthy crops of clones consists of the following.
Readiness
Once you start the actual process of removing live branches from your plants to root as cuttings, you need to move quickly and surely. It’s kind of like surgery: Have the necessary tools right where you need them when you need them, including:
- A cutting board or clean, hard, flat surface
- Propagation trays and domes (10″ x 20″ nursery trays and clear, tight-fitting lids)
- A medium to stick the cuttings in (peat pellets, rockwool cubes, organic plugs, etc.)
- Dechlorinated water, either filtered or spring water
- A water glass or vase
- A sharp, sterile blade
- Scissors
- Root stimulator
- A “hole poker,” such as a metal nail about the same diameter as your cut stem
- A spray bottle
- Gentle fluorescent or full-spectrum LED lighting, 12 to 18 watts per tray
- A thermometer.
Cleanliness
Keeping things hygienic produces stronger, healthier rooted cuttings. Propagation environments are warm and humid, which makes them the perfect breeding ground for plant diseases like stem rot. By keeping things clean throughout the process, you can avoid introducing harmful disease-causing bacteria or fungi by way of dirty tools or fingers, etc. Cleanse, scrub and rinse all of the materials coming into contact with the plant material while taking your cuttings.
Pro tip: One part unscented liquid chlorine bleach to nine parts cold water is a good all-purpose cleaning and disinfectant method for all of your propagation materials (trays, domes, cutting surfaces, etc.). Rinse these well after scrubbing with the bleach solution. Tools can also be wiped with isopropyl alcohol before use.
Wash your hands well before handling the cuttings and propagation materials. Gloves add a further degree of protection.
Steadiness
While a steady hand helps, steadiness is more about maintaining a stable environment for the cuttings while they root and moving quickly and surely through the process of taking cuttings from plants, sticking them into the medium and covering them with a humidity dome. Minimizing the time that a cut stem is exposed to air is very important so that an air bubble doesn’t develop in the stem or it becomes infected from contamination via exposure.
How to Take Cuttings
Create a workspace that is free of obstacles and allows you to work easily. You’ll want to be able to make the cut on a flat, clean surface, dip the cutting in a rooting stimulator, and then stick it into the rooting medium as quickly and steadily as possible. This means having your cutting board, blades, and rooting stimulator all clean and laid out at the ready.
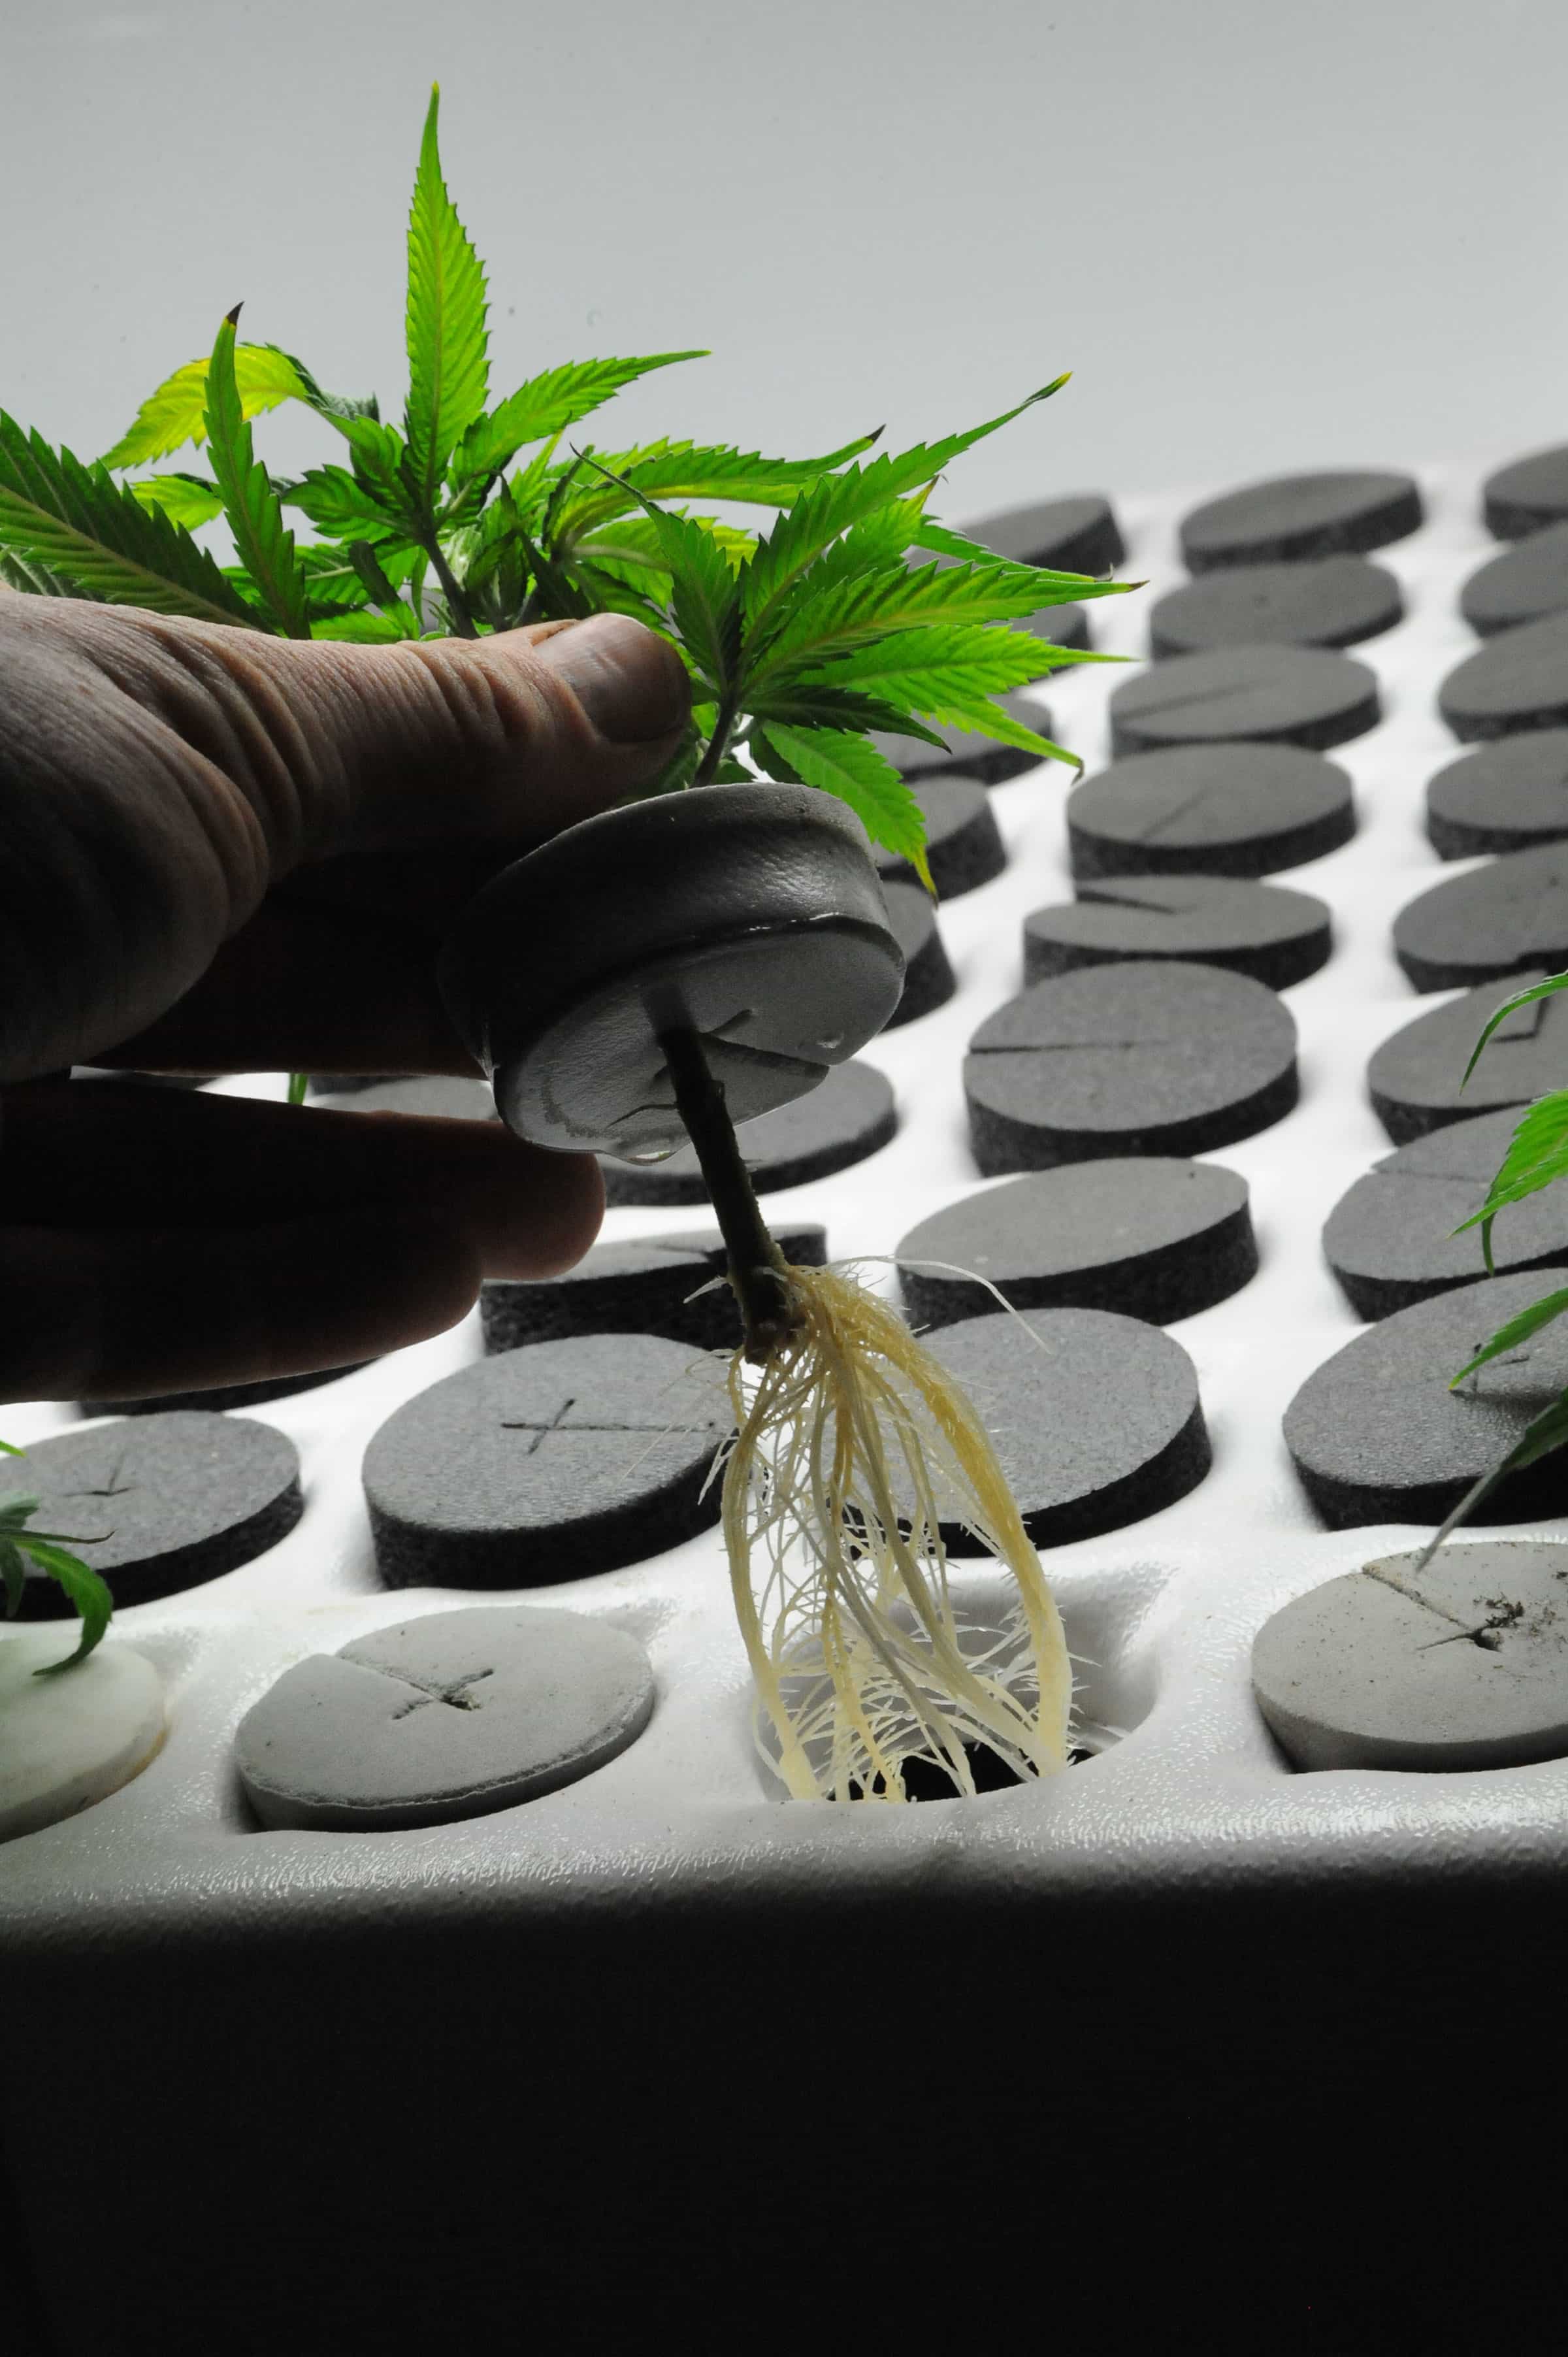
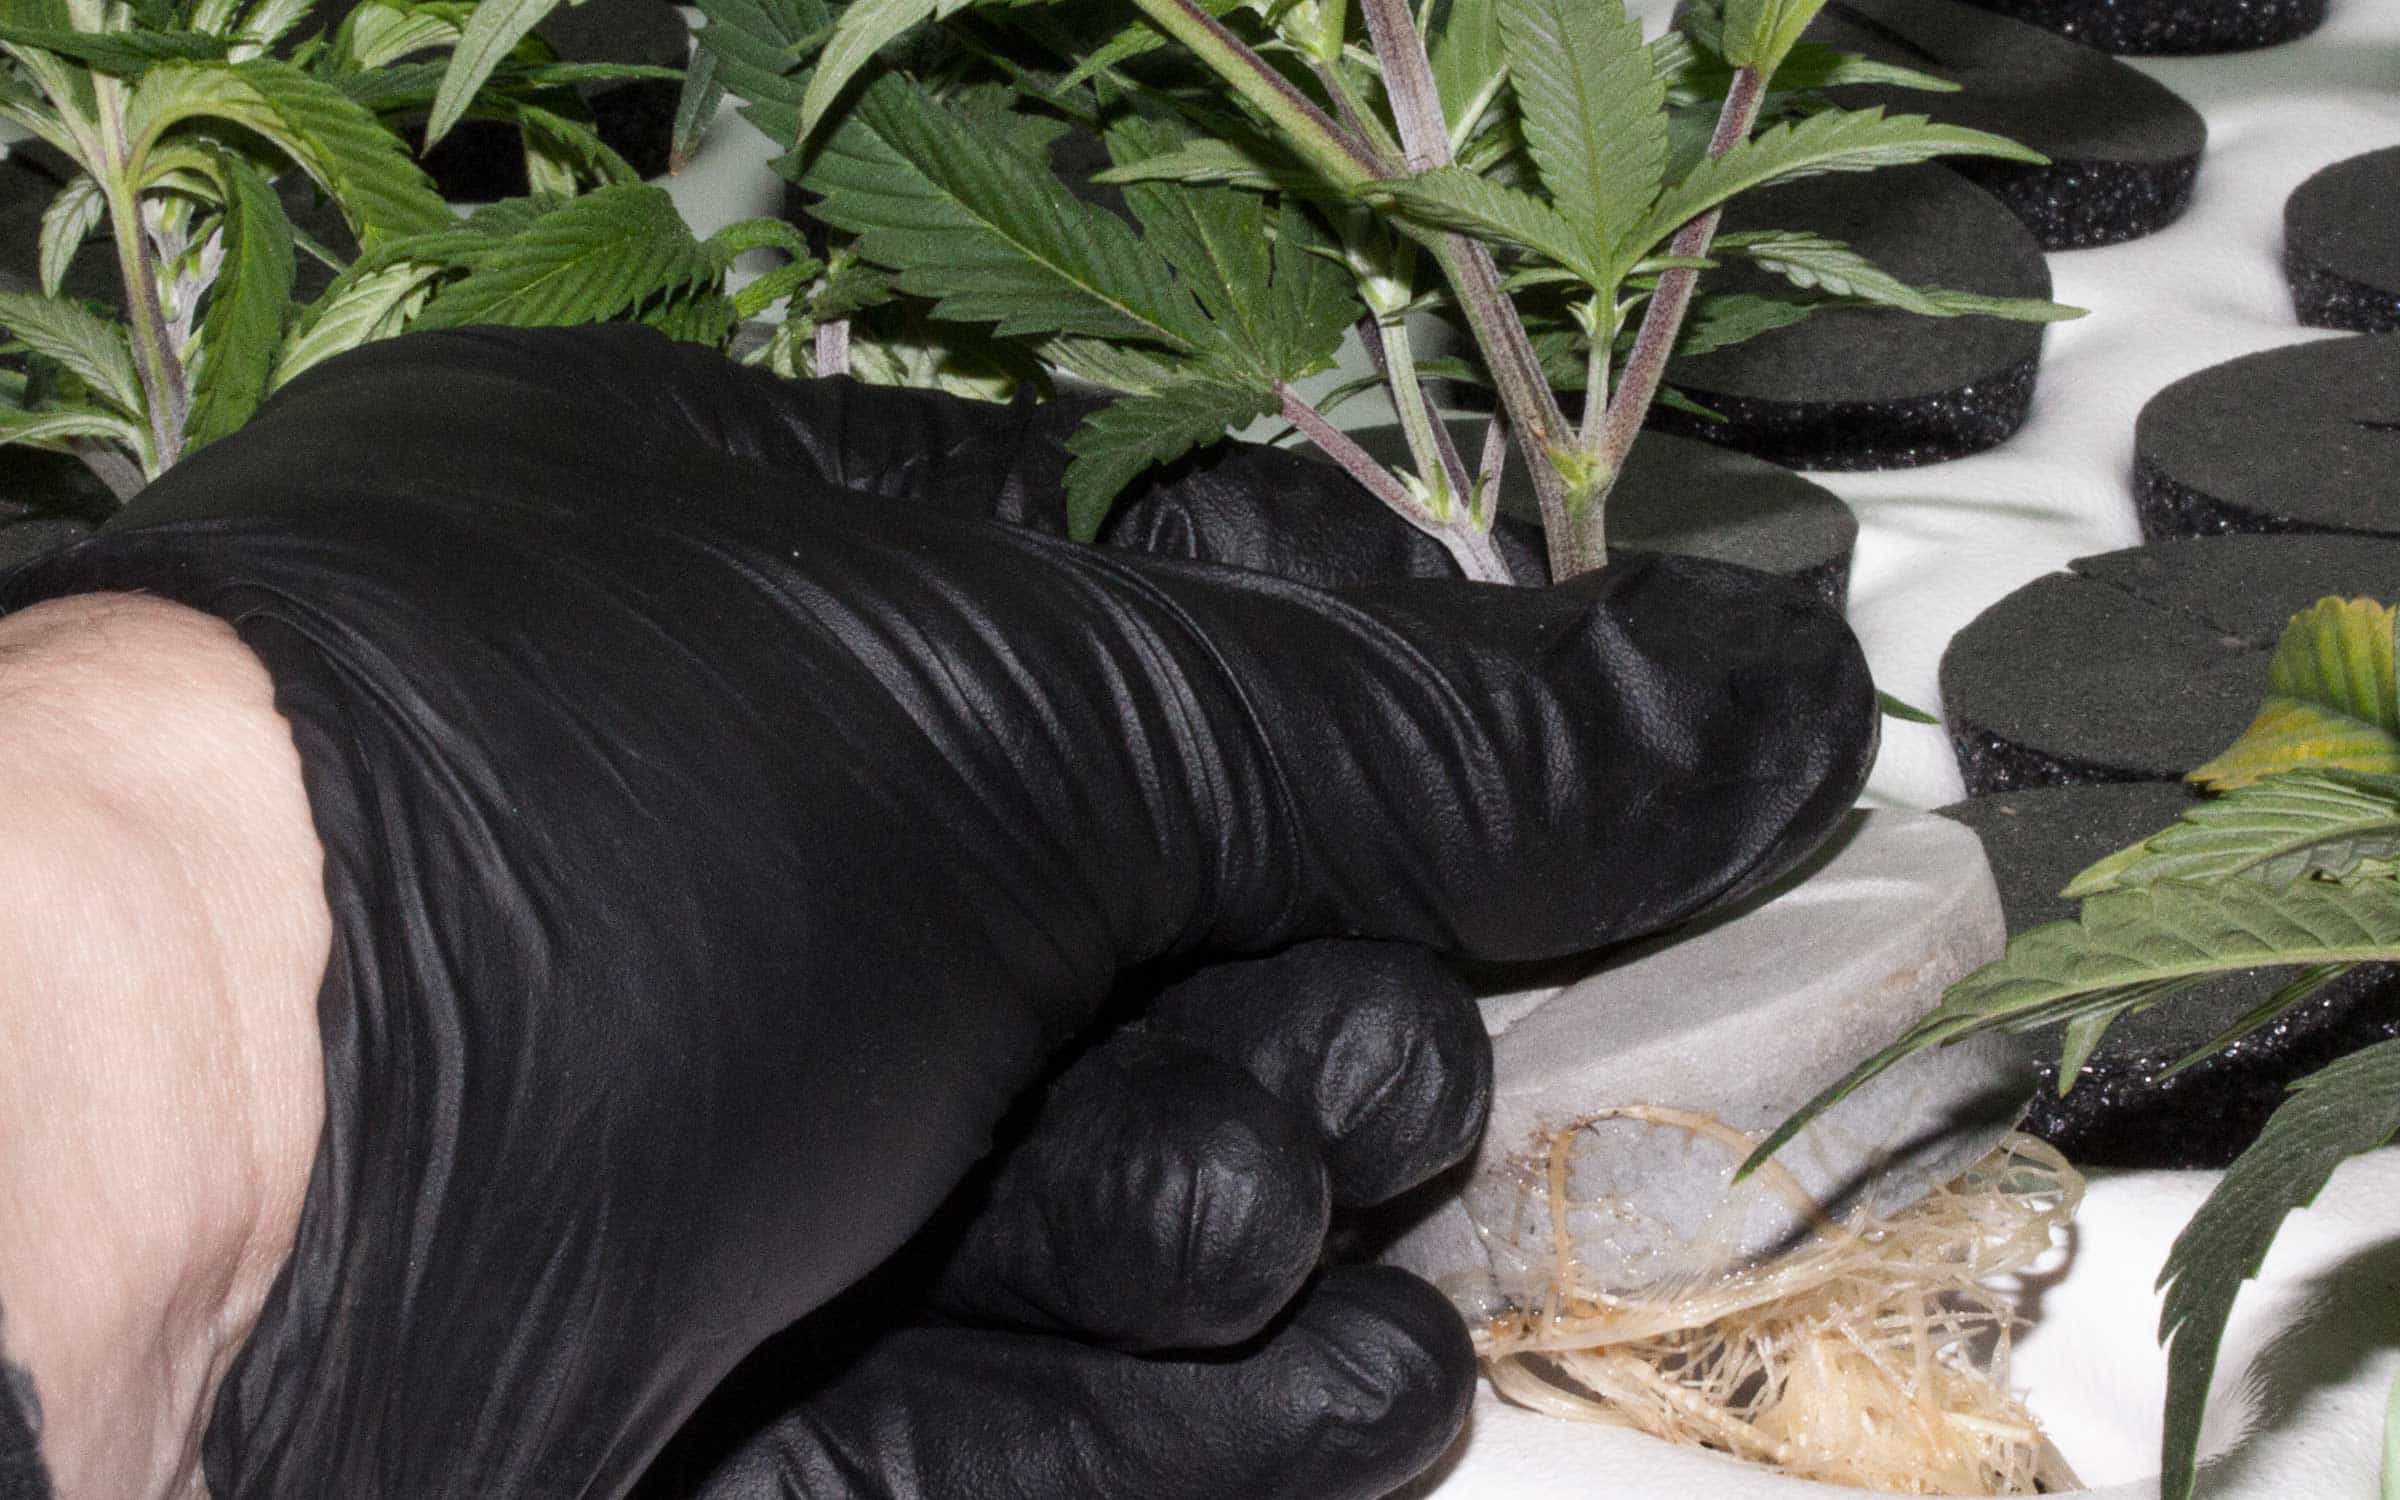
An aeroponically-rooted cutting ready to plant. (Photo by Erik Biksa)
You’ll need to have your rooting medium prepared beforehand. Using filtered or spring water is recommended for this process. Some types of materials, like rockwool, may require that you adjust the pH of the water (i.e., to increase the acidity to counteract the high pH of the rockwool material). Inexpensive liquid pH test kits, such as those for aquariums, are widely available. Food-grade pH adjusters can be purchased as well from your local hydroponics supplier.
Pro tip: Adding a very mild nutrient charge to your rooting medium is recommended—for example, fertilizer at one-eighth strength. Beneficial microbes typically perform best once roots form, although species like Trichoderma can be helpful in preventing outbreaks of disease-causing microorganisms from contamination in the rooting materials.
Once your medium is prepped, covered and put under the lights, place a clean thermometer under the dome and wait until it warms up. Optimally, you want around 75°F to 82°F inside the propagation environment. With a snug-fitting humidity dome, you should see moisture begin to bead up on the lid—this is normal and shows good humidity levels to root the cuttings. If the air is too dry, the cut stems (which have no roots) will dehydrate quickly, wilt and die.
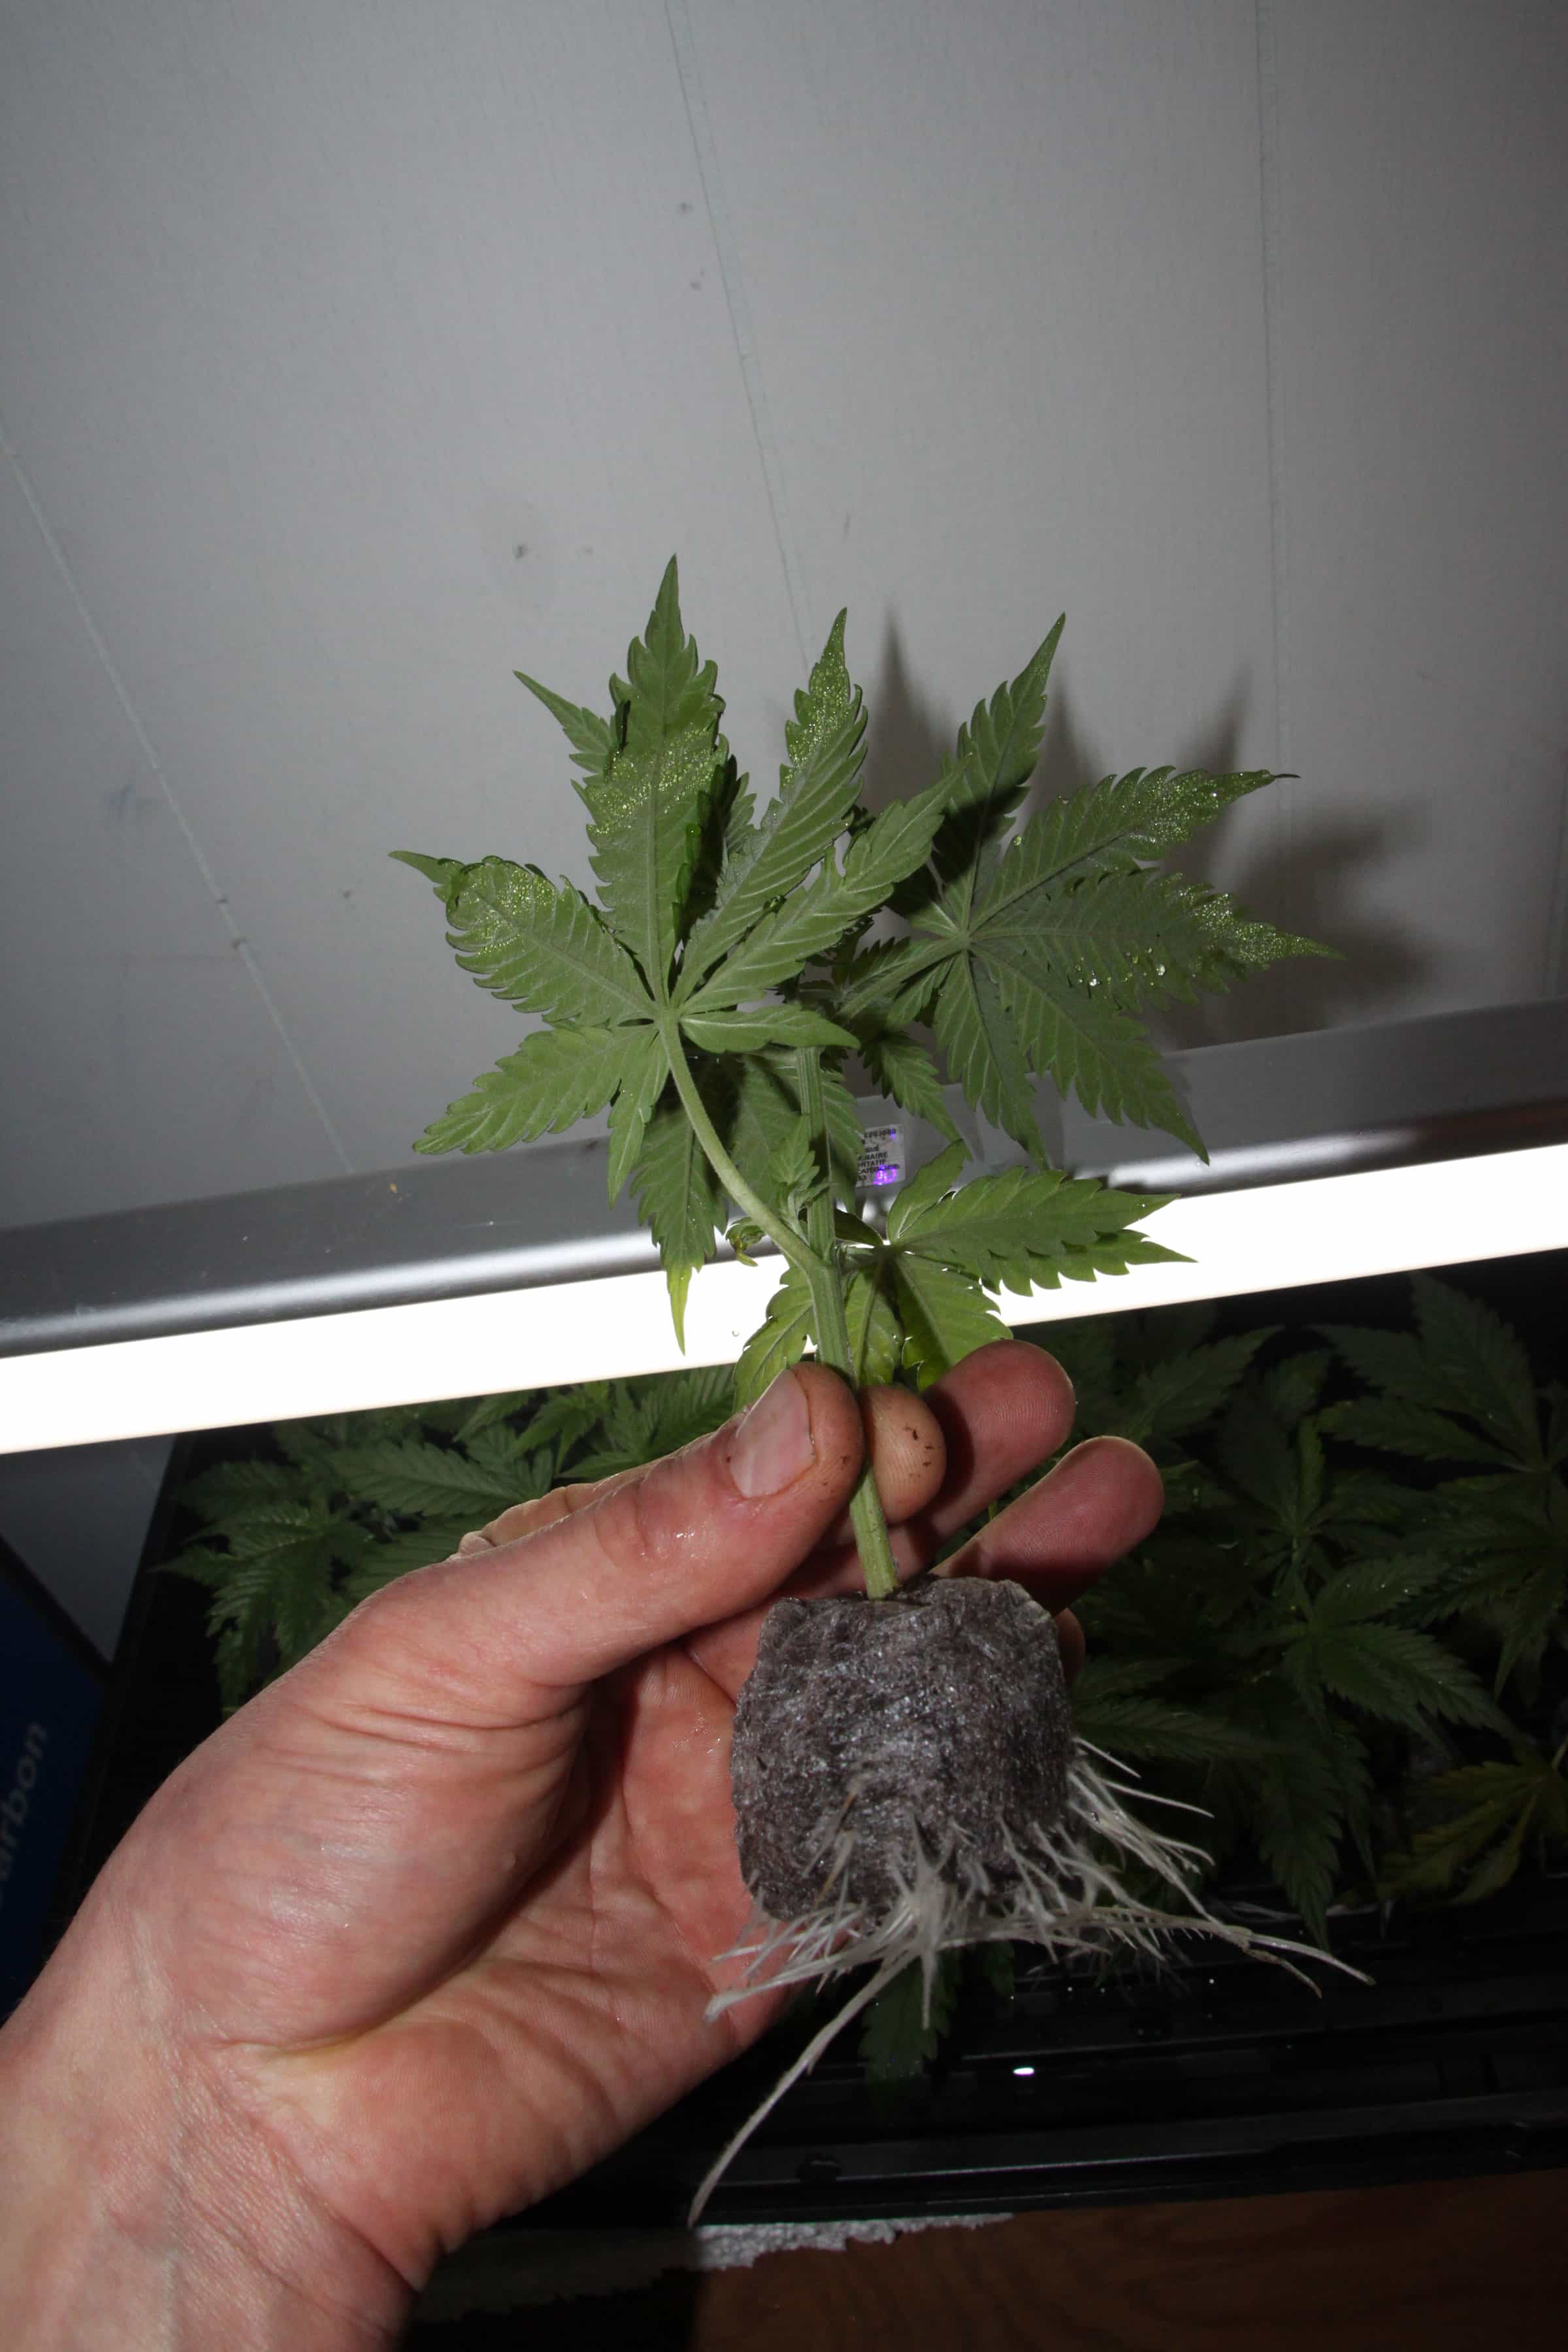
A clone rooted in its medium. (Photo by Erik Biksa)
Fill your spray bottle with clean filtered or spring water. Adding some B-vitamins helps prevent shock in both the mother plants and the cut stems during the process. You can add the same solution to a clean water glass or flower vase as well. Raise the lights or shut off any high-intensity lighting sources and give the mother plant(s) a light mist.
Next, give the donor branches a final inspection, then cut off portions of the stem longer than you intend to root. Put the cut end into your water glass or vase filled with solution right away. Gather up several branches or stem pieces like this until you have enough to fill a tray or as many as desired.
With your rooting medium neatly beside your cutting area, and with holes for the cuttings pre-poked to a depth of at least three-quarters of an inch, you can strip away excess foliage and growth sites from the cut material, leaving a clean stem with a 2-to-3-inch-diameter crown of foliage at the top (trim any excess with scissors). Finally, place the stem down flat on the board and make a 45-degree cut to the final length for rooting.
Dip the cutting into your rooting stimulator, following the manufacturer’s instructions. Finally, stick the dipped cut end into the rooting medium. First making sure that your fingers are clean, gently firm up the medium at the top of the stem to ensure good contact. Give the cut clone a very light mist and continue until the tray is full or you have sufficient cuttings prepared. It’s advisable to root at least 10 percent more cuttings than you’ll ultimately need and select only the best later.
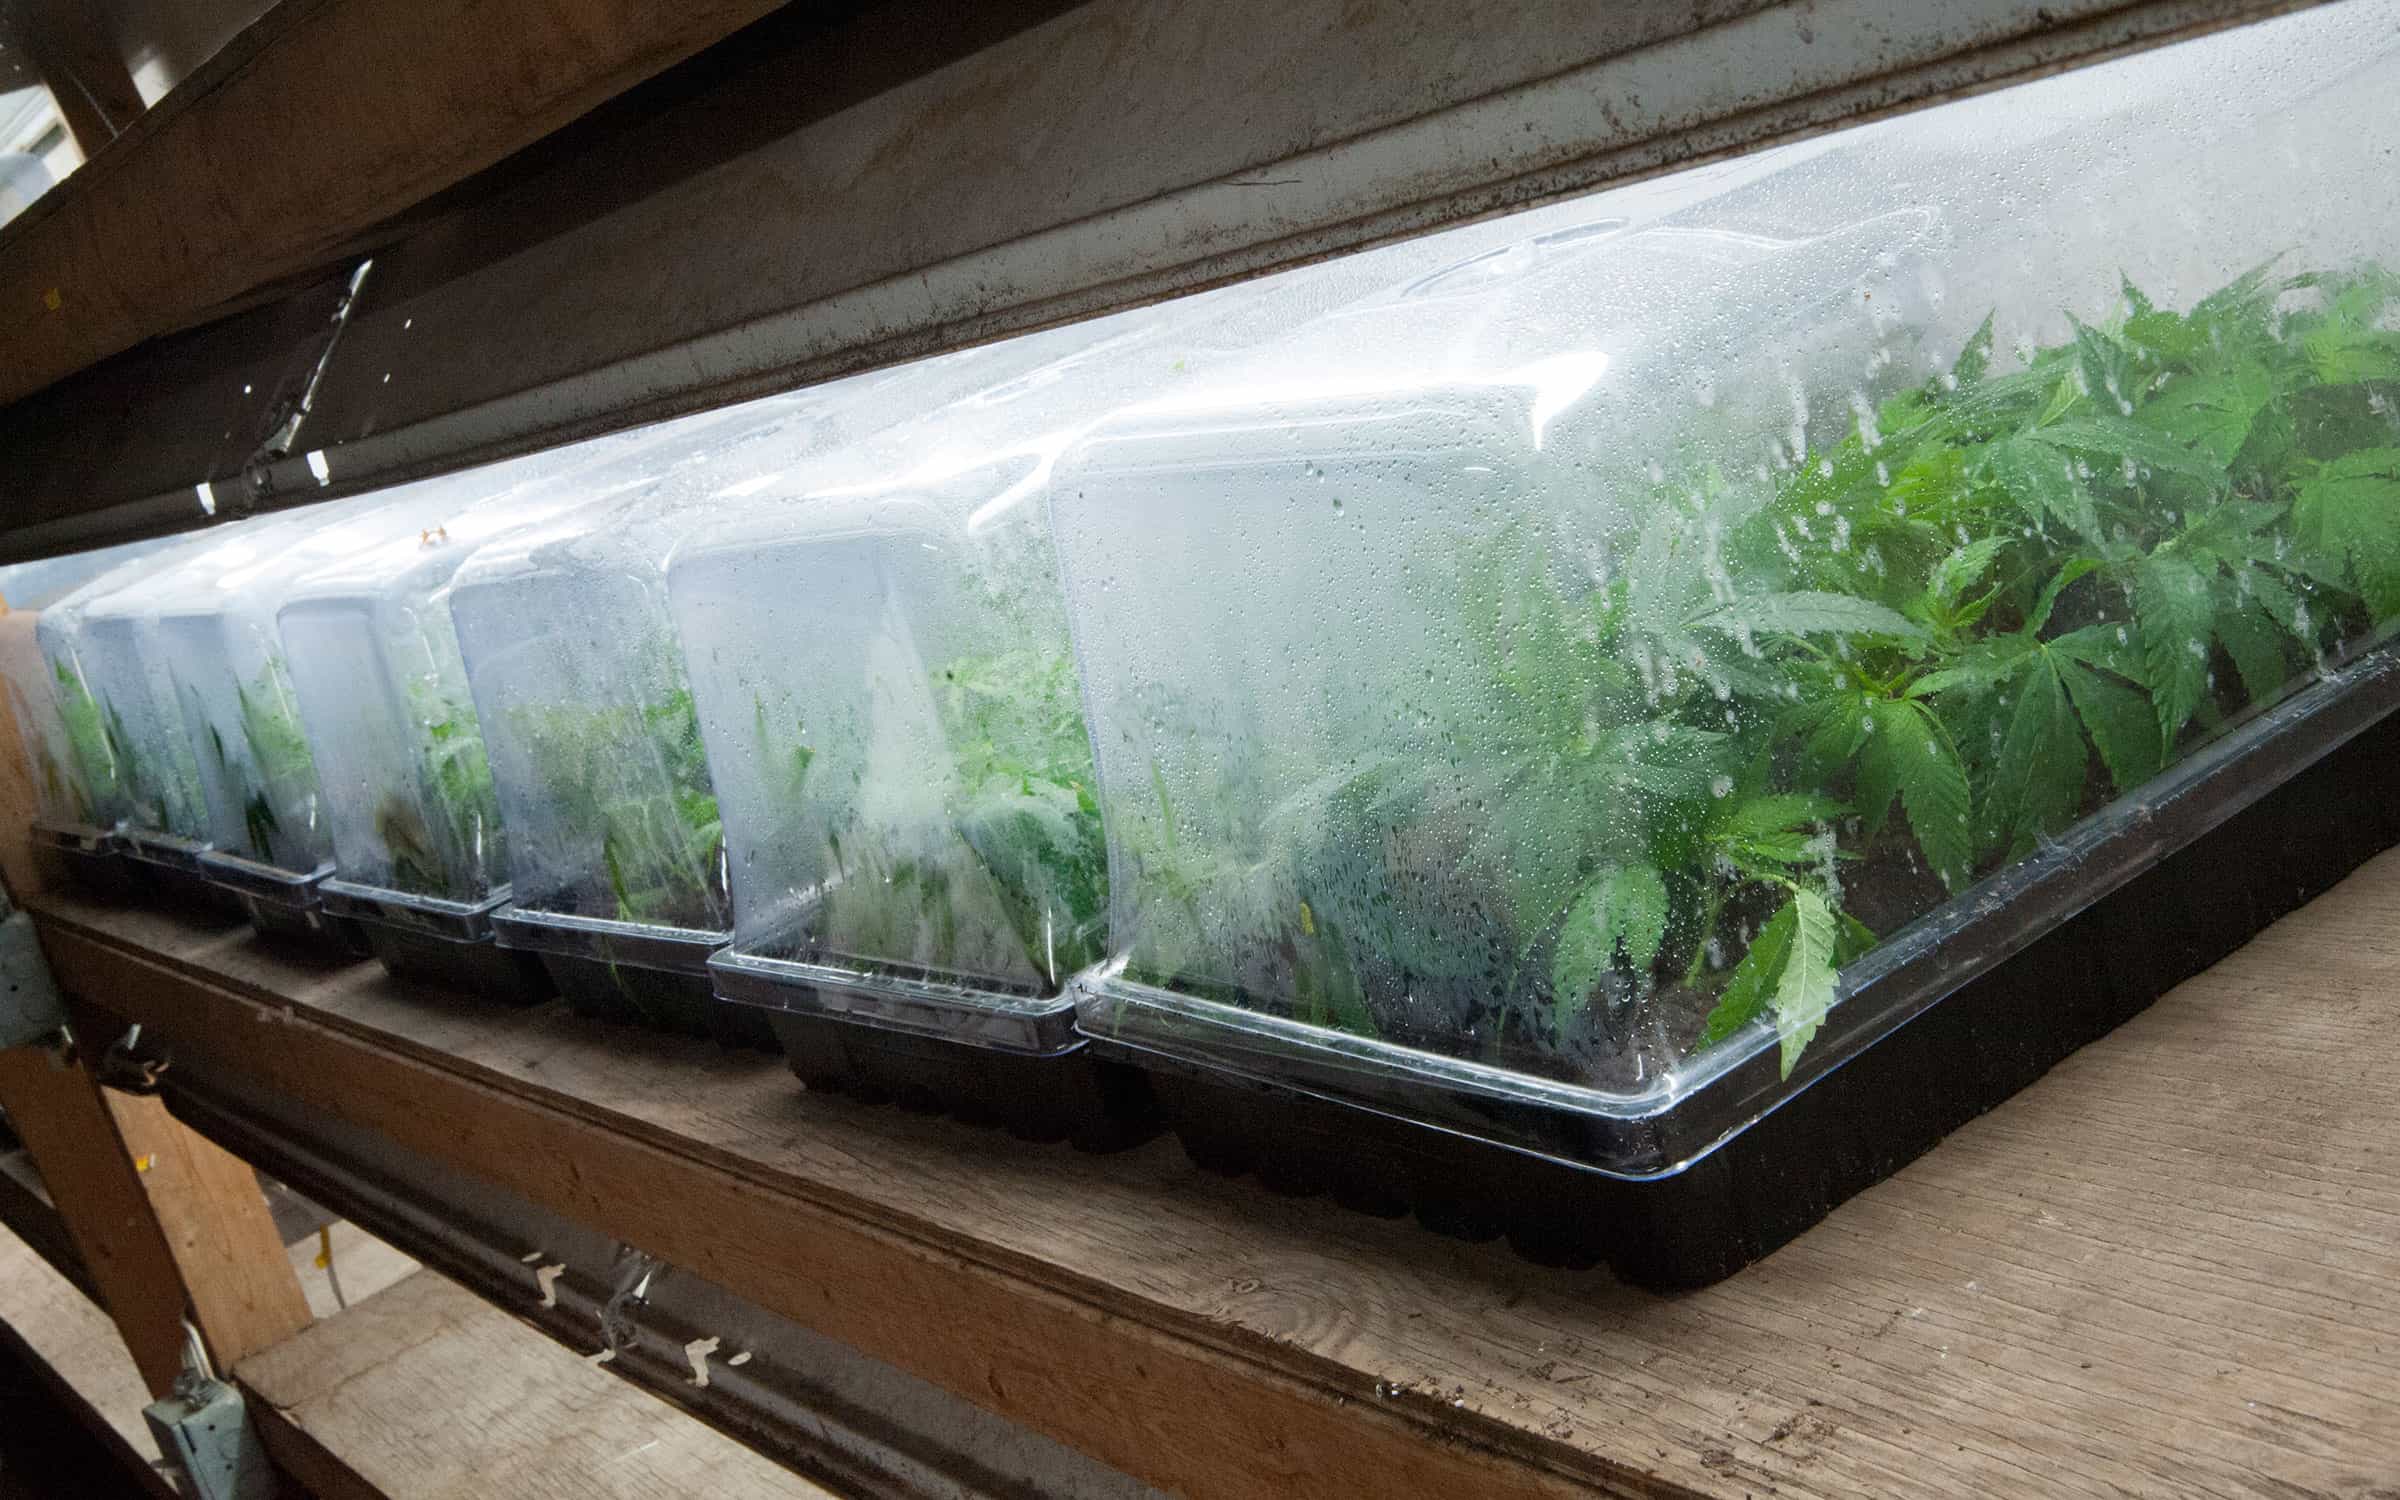
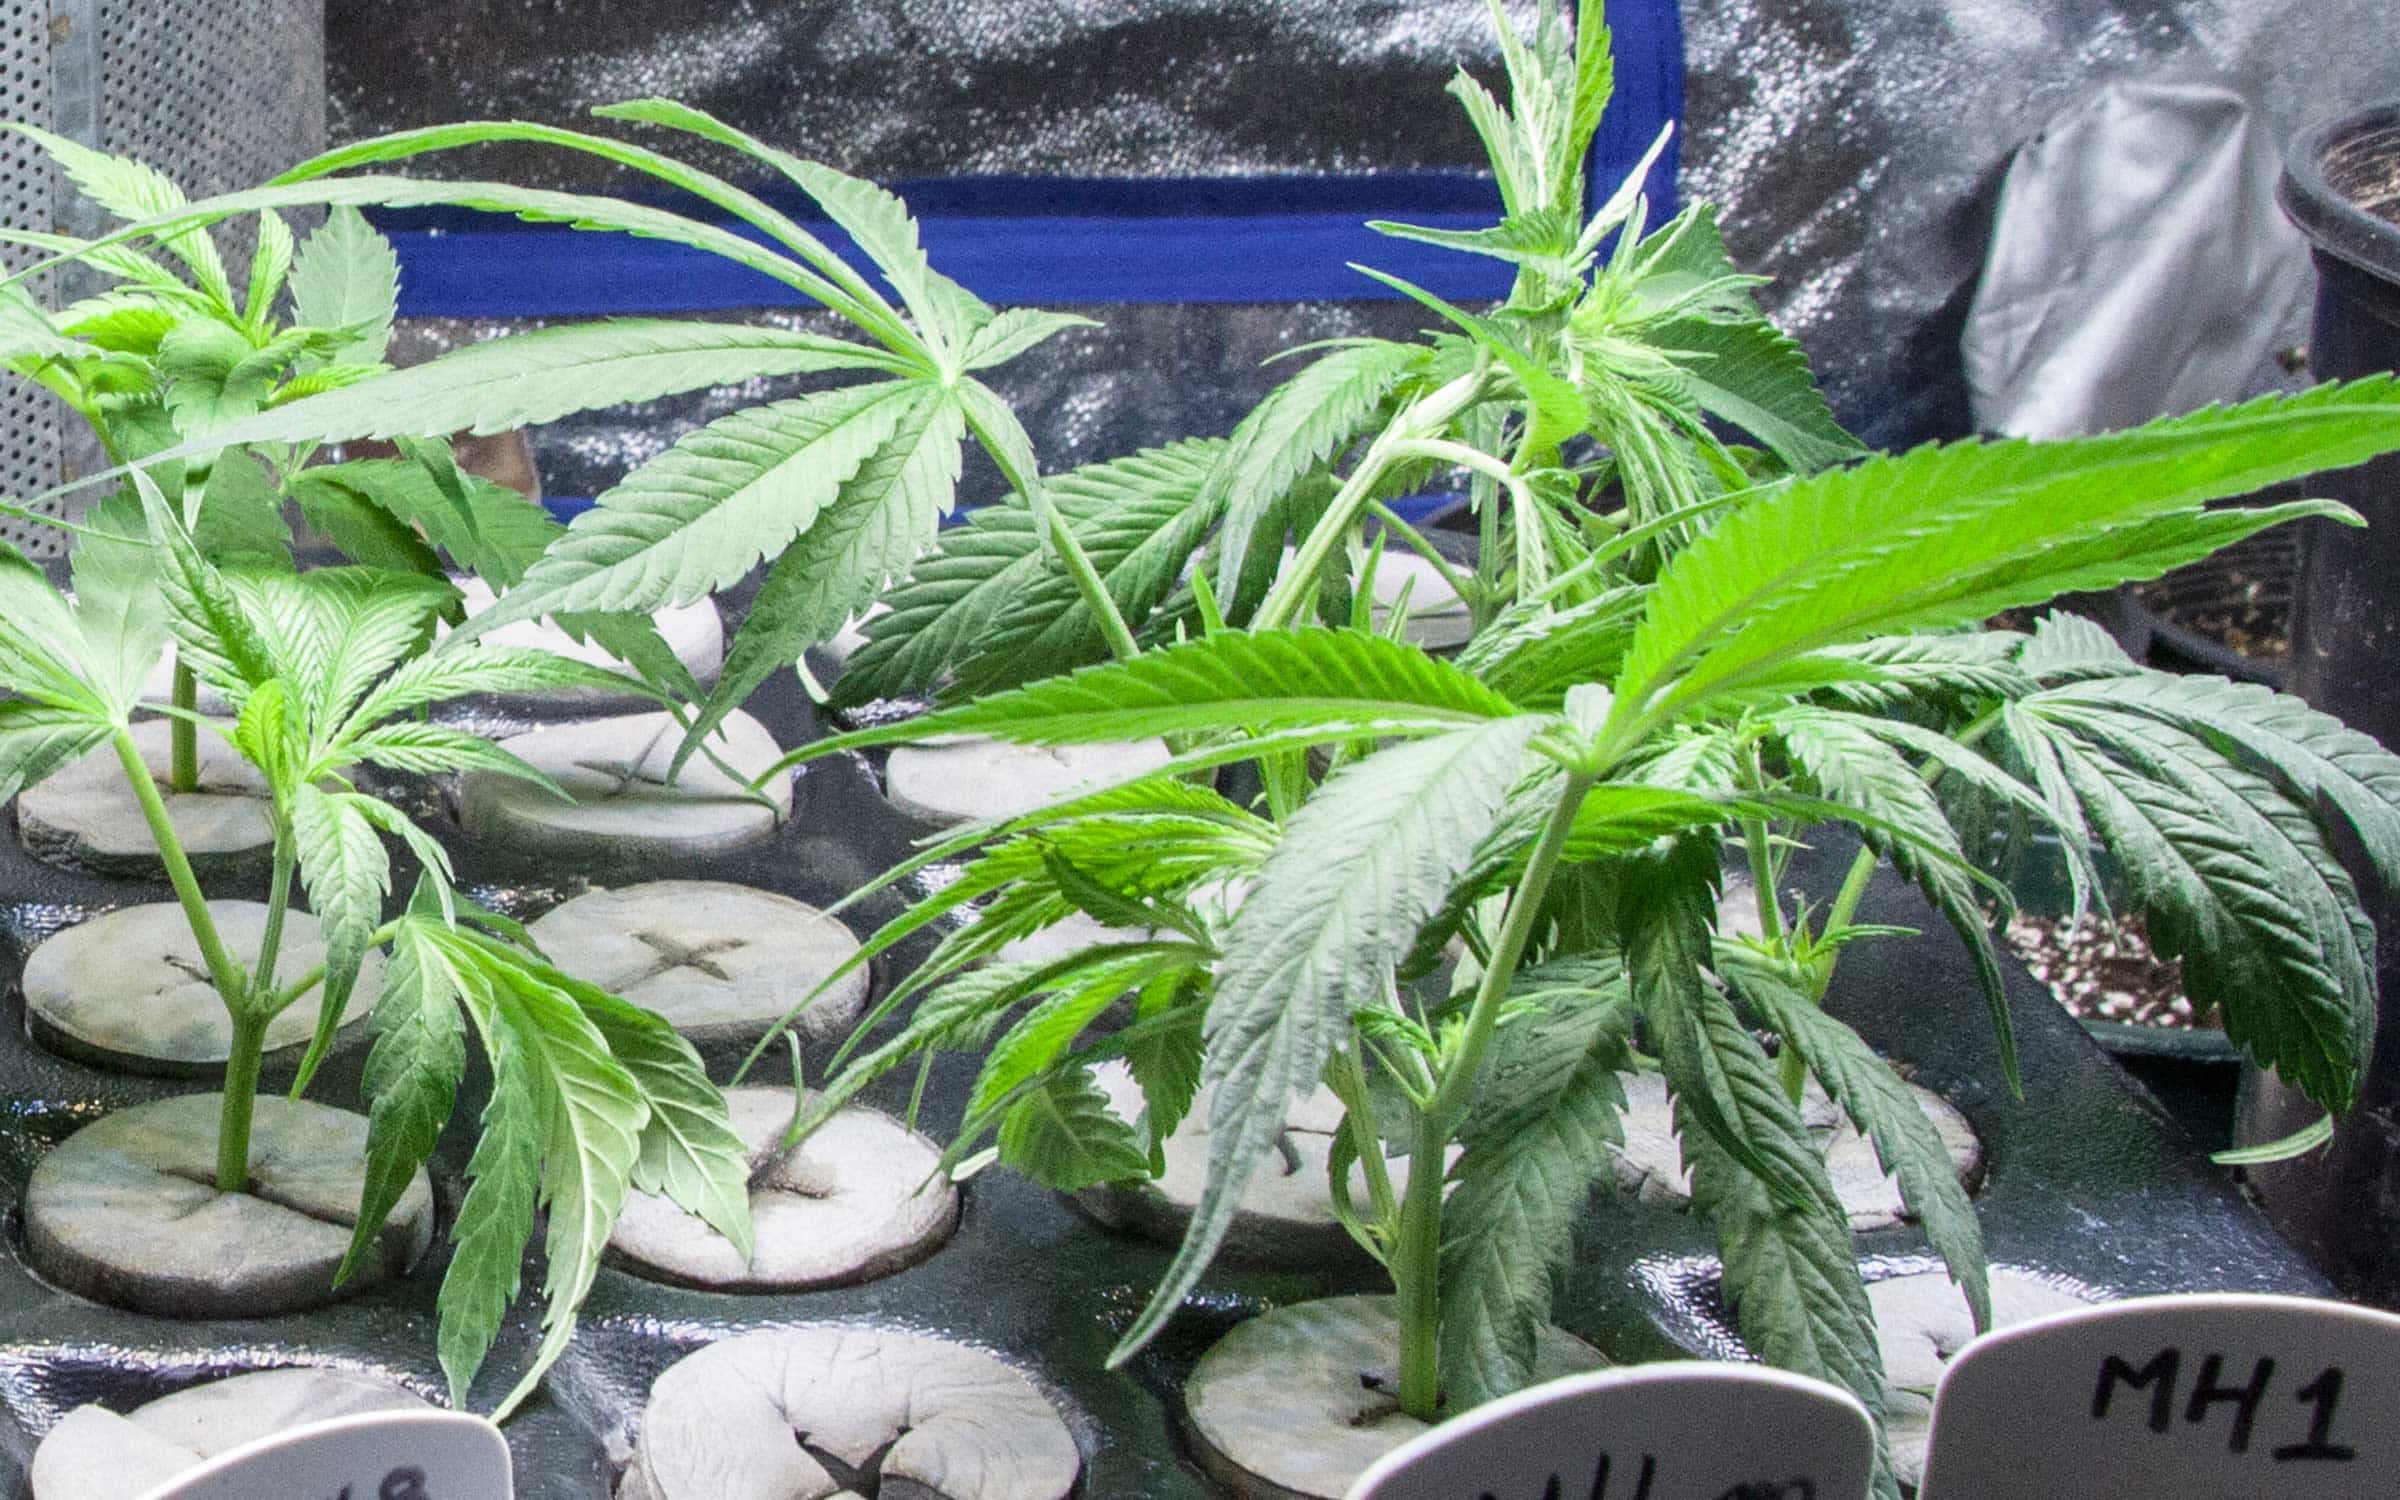
Cover the tray with the humidity dome and keep under constant, gentle full-spectrum lighting. Make sure that the temperature remains a steady 75°F to 82°F. Lift the dome off daily and wipe it with a clean paper towel, then place it back on top.
Most types of rooting medium won’t require any more watering until the roots show when using a snug-fitting propagation dome, but some might. Use your best judgement, being very careful not to overwater and create stem rot in the warm, moist environment.
Humidity domes increase success rates. (Photo by Erik Biksa)
Pro tip: Ensure that there’s no freestanding water on the bottom of the tray(s) underneath the rooting medium, and add a drainage layer if necessary.
Some strains will root faster than others; however, you will usually start to see roots in 10 days following these directions. Once more than half of the cuttings are showing roots, start lifting the dome off for 15 minutes at a time and leaving it back on for several hours to “harden off” the cuttings prior to transplant. Also, keep plants with small root systems away from strong breezes or ventilation.
Further Tips
- If it’s a little colder in your spot, consider using a heat mat to provide gentle, even bottom heat.
- If it’s getting too warm inside the humidity dome, try moving the light source further away or choose a slightly cooler spot to set up.
Aeroponic Cloning: Next-Level Plant Propagation
If you’re serious about plant propagation, or perhaps don’t have the time or patience for rooting clones using the traditional methods, aeroponic cloning could be your ticket to cropping in the fast lane.
Collars should firmly hold the stems. (Photo by Erik Biksa)
Just like a serious high-performance engine or a well-trained athlete, aeroponic cloning takes advantage of oxygen boosts to ignite a faster and stronger rooting process. Aeroponics involves using sprayers to diffuse the nutrient solution, increasing the surface area for dissolved oxygen (DO).
Pro tip: Roots LOVE oxygen!
Many aeroponic propagation systems, like the well-known EZ Clone series, are also great for rooting much larger cuttings with full sets of leaves. Rooting 9- to 12-inch-tall cuttings with massive root systems is very doable using aeroponics, saving the valuable vegetative-growth time typically required later.
Most aeroponic cloners come with a set of instructions developed over time to help ensure successful cloning for anyone using their system. However, based on years of feedback and research, here are some master aero-cloner tips to further guarantee your success or perhaps take it to the next level:
- Run it warm. Keeping the solution at 80°F, while contrary to most optimal-temperature ranges for hydroponic root systems, can amp up your clones’ metabolic rate and speed up the rooting process, assuming good hygiene.
- Intensify the light. Your aeroponic cuttings will respond positively to slightly more intense lighting levels because they’re not stressed for moisture and oxygen due to optimal conditions at the cut stem in the aeroponic system’s rooting chamber.
- Go big. You can root much larger cuttings with ease using aeroponics, even with full sets of leaves to save on veg time later on.
Pro tip: Most aeroponic rooting systems like the EZ Clone don’t require a propagation dome because plants can breathe oxygen and take in plenty of moisture at the cut stem, keeping hydrated and healthy while rooting. While this is great because it helps prevent any funk, and lets your plants breathe freely and even grow while rooting, it means you should avoid ventilation or breezes in the propagation area that can cause moisture stresses.
Always label clones for proper identification. (Photo by Erik Biksa)
For further consideration: Believe it or not, aeroponics just might be the best rooting method for organic marijuana growers. Because plants root so fast and well due to the amped-up oxygen levels, you can stimulate new root systems in a respectable amount of time without the use of rooting stimulators (i.e., synthetic hormones). There are some great aeroponic-cloner recipes out there that take advantage of beneficial microbes and other natural ingredients rather than synthetic chemicals.
RELATED: The 2017 Ultimate Soil Vs. Hydro Grow Guide
For all of HIGH TIMES’ grow coverage, click here.


0 DL LiNKS:
Post a Comment
Add yours...